Introduction
From
an administrator’s point of view, a SIP trunk is very similar to a Triton
analog trunk. Once it is up and running, administrators can assign a trunk
access code to it. They also can mix SIP trunks with analog trunks, T1, or PRI
trunks in the Out Call Routing table. Like analog trunks, each SIP trunk has a
PSTN number. They can also receive caller name as well as caller ID.
Prerequisites
AltiWare 5.1 (ACC or ACM) version 5.1.0.1473, or
above, loaded
Contact your EToneConnect Service Coordinator or
refer to the EToneConnect Settings section of the EToneConnect Install Profile
to get the following account-specific information:
§
A SIP Proxy IP address –
An EToneConnect Service Coordinator will provide this along with your
SIP trunking account.
§
A user name – PBX Username field on the EToneConnect Install
Profile
§
A password – PBX Password field on the EToneConnect Install
Profile
§
Proxy
Port – 5060
§
Registrar
Port – 5060
§
Register
Expiry Time – default (60)
Note: It’s better to subscribe
to a service provider number that has your same area code. Otherwise, strange
behaviors may occur when doing some advanced call features such as redial, call
return to a local number and so on.
First Steps
1.
Obtain a SIP trunk license
from AltiGen.
2.
Register the license using
AltiGen’s online license registration procedure.
3.
Reboot AltiServ.
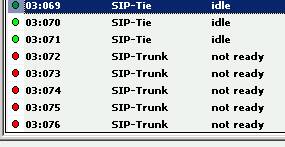
4.
After the system is
rebooted, SIP-Trunk should show as “not ready” in Trunk View.
5.
If your AltiServ is behind
a firewall / NAT router, configure the firewall / NAT router.
See AltiWare Administrator’s online Help: Index
> AltiServ behind NAT > configuring.
If the firewall / NAT router is not properly configured, SIP trunks will not
work.
Note: On the Enterprise
firewall (both TCP and UDP), disable SIP ALG processing (if it is provided).
AltiServ already performs this function. If you don’t disable SIP ALG processing
on the Enterprise firewall, you may experience communication problems.
Configuring in AltiEnterprise Manager
1.
In AltiWare Administrator,
choose VoIP > Enterprise Network Management. This
opens AltiEnterprise Manager.
2.
In AltiEnterprise Manager,
click the Codec button.
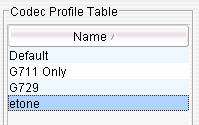
3.
Add a codec profile. In
this example, we have named the new profile “etone”
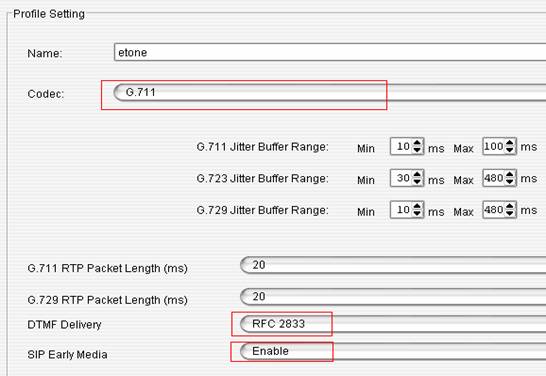
4.
Set the following:
§
Codec = G.711
§
DTMF Delivery = RFC 2833
§
SIP Early Media = Enable
In AltiEnterprise Manager, go to Servers button > IP Codec
tab > IP Device Range panel. Add
a range, using the SIP Proxy IP address that you got from EToneConnect. In the
example below, we are using 207.166.192.175. The range we add is:
§
From: 207.166.192.175
§
To: 207.166.192.175
§
We set the Codec
as “etone.”

Configuring in
AltiWare Administrator
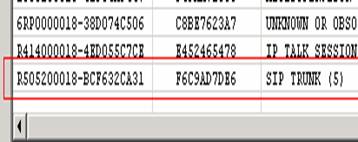
1.
Under “SIPSP” board
configuration, the number of configured channels and licensed channels are
displayed. In this example, there are 5 SIP trunk channels.
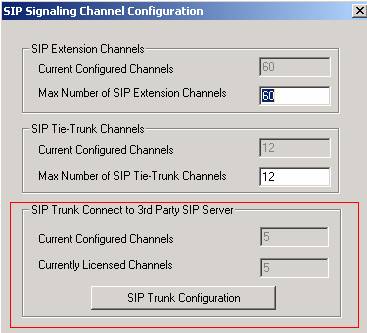
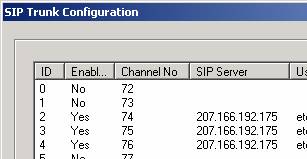
2.
Click the SIP
Trunk Configuration button. The SIP Trunk Configuration dialog box opens.
3.
Highlight an entry in the
dialog box, and then click Edit. The
following dialog box opens:
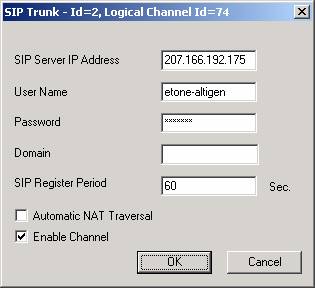
4.
Enter the SIP Server IP Address, User Name, Password and SIP Register
Period. This account information is obtained from EToneConnect.
5.
Uncheck Automatic NAT Traversal and check Enable Channel.
If multiple SIP trunks are
subscribed, follow the steps below to copy the same settings to other SIP
channels.
1.
Highlight the source entry.
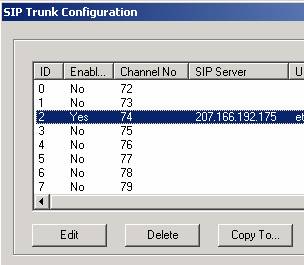
2.
Click the Copy To button.
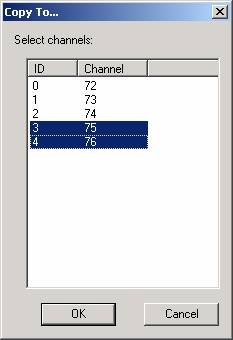
3.
Highlight the destination
channels and click OK.
In
Trunk View, the SIP trunks will be displayed as idle. The SIP trunks are ready to use.

Configuring
SIP trunks (trunk access code, in call routing, outcall routing, and so on) is
similar to configuring analog trunks or T1/PRI trunks. See AltiWare
Administrator online Help under “Trunk Configuration,” or see the AltiWare
Administration Manual, “Trunk Configuration” chapter.
Verify Configuration
To
verify the configuration and make sure the voice can be heard in both
directions,
- Make a call through
the SIP-Trunk.
- Receive a call through
the SIP-Trunk (for convenience, you might want to call from your cell
phone for this).
- If you have several
SIP-Trunks, make/receive several calls at the same time.
If
the voice is not heard in both directions, please review the configuration
steps to make sure you have configured properly. If you still have a problem,
contact EToneConnect or AltiGen Communications.
Support
AltiGen
Technical Support
510-252-9712
EToneConnect Support
440-363-7010. Press 2 for
Support.